
At the time that you read this Micro Focus Application Virtualization 11.2 will be available and the most important change in this release is the support for Windows 10. Application Virtualization is a great product to work with and in the past few releases much has been done to improve the streaming server. I’m looking forward to version 12 that will ship later this year, where we will be using the virtualisation technology during the packaging process, and running the install within the virtual bubble will make the packaging process a lot easier. But it’s not ready just yet.
I’ve collected some questions over the past few months about ZAV (ZENworks Application Virtualization). If you have any questions you would like to get answered on this page, just send them to qanda@open-horizons.net.
Q: I’m using virtual apps in my environment but wonder if I should have another look at application streaming? Some time ago I saw a demo where you could load files to your webserver to host the streamed apps but the process appeared complex.
A: There has definitely been a lot of change since the early days of application streaming. Initially you could use your existing webserver to host the virtual apps. Very soon after that the ZENworks Application Virtualization Server became available that made hosting streaming apps so much easier. The ZAV-Server is actually just a virtual app that you need to install that has its own built in webserver. Deploying the server is now very easy and you are quickly ready to run.
Q: So do you have any tips or tricks I can use when I start with the Streaming Server?
A: As always, it might be useful to have a look at the documentation! Next to that, one tip I always give customers for when they install their ZAV Server is to start by creating a local account and make that an Administrator. Then if anything goes wrong with your LDAP server you can still log in and get access to the admin console. Let’s walk through these steps:
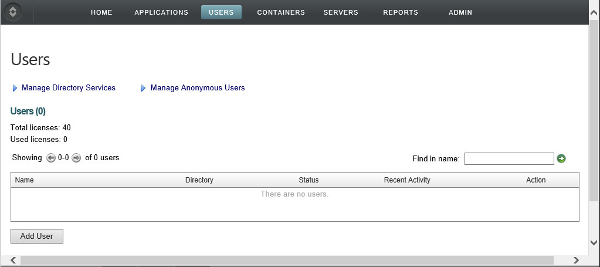
- After the installation the install will open the browser and take you to the admin console. As no admin has been defined you will be logged in automatically. Now the first thing you will need to do is to create a local user that will become the local admin.
- To create the local user go to Users, and on that page click Add User. (Figure 1).
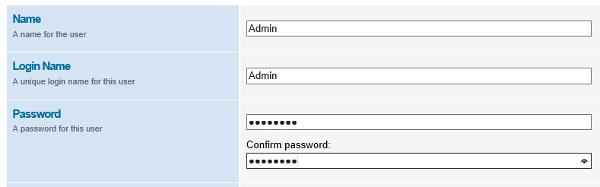
- Enter the full name of the user, the login name and enter a password. (Figure 2). Now just scroll down and click Save.
- You’ve now created a local user account sothe next thing you need to is to make this account an administrator. On the Users screen scroll down to the groups section and click Server Administrators. Just add the user you just created as a member of this group, and hit Save.
- The next thing you will see is a login screen, as you now have a System Administrator defined, and the system will require you to login with an admin account. Logging in with the account you just created will take you back to the admin console.
- After creating the local admin account you can obviously add a LDAP connection to the Directory and import your users from AD and/or eDirectory. For daily use you can obviously add any LDAP user to the Server Administrators Group as well so that you can manage the server with your standard account.
Q: I’ve imported my users from the Directory but they are all marked as Inactive. If I open the user I can set them as Active but do I need to do that for all users?
A: You are right, after importing the users they are set to inactive, but just try to log in with one of these user accounts. You will notice that you are able to login and that the status for that user will automatically change from Inactive to Active. The Active state indicates a user has been logged in and if so a license is counted. There is no need to enable the users manually.
This article first appeared in OHM 32, January 2016.