Most workspace systems were built with legacy IT systems in mind and are too heavy and complex for today’s environments. They have become bloated with features that are not relevant, with a code base that is dated, making it hard to quickly implement new features. Furthermore, these systems are costly, complex to manage and are not intuitive for the end-user to use. This is where Liquit excels.
What is Liquit?
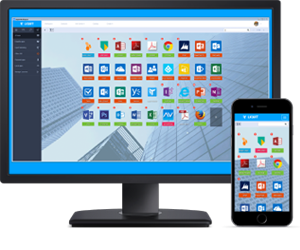 Liquit is a new workspace product based on HTML5 / CSS3 technologies. It delivers a consumer style IT experience not unlike consumers know from an app store.
This interface feels intuitive to the user as they have been using it for years on their mobile phones and even on their desktops at home. It takes care of application provisioning and allows the user to add their own (personal) links to URL’s, locally installed applications, etc. The Liquit agent is very small (< 1MB) with great performance, making Liquit an ideal candidate for use in virtual desktop (VDI) environments. At the same time, it is built for traditional workspace environments, so traditional MSI distribution is also available.
Installing Liquit
The Liquit workspace component runs as a service on any modern Windows Server edition.
- Operating System - Windows Server 2003 R2 or later
- RAM - 4 GB
- Storage - 40 GB
- Database - SQL Server 2008 R2 or later (Express supported)
- Client - Liquit works on any device with an HTML5 capable browser. For full functionality the Liquit agent should be installed on any modern Windows operating system (Vista and higher).
The database needs to be created before you install the Liquit Workspace Server component. Running through the install is easy. Enter your database details and the Liquit installer takes care of setting up the system.
After the installer completes, the Liquit workspace is up and running. You can access it using any browser on the server IP on port 80 by default. You should now be greeted by the login screen.
Managing Liquit
The Manage tab allows you to completely configure the Liquit system to your needs.
The Configuration section (figure 1) houses all the different tunables for the system, including branding options to personalise the way Liquit looks, E-mail configuration and licensing, etc.
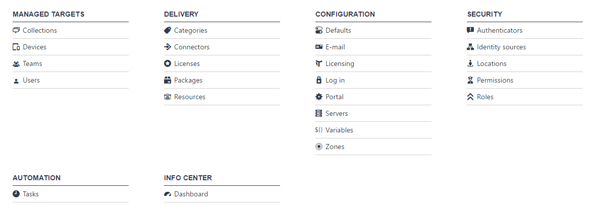
This section has 2 special items that deserve mentioning; variables and zones.
Variables
The Liquit system has a variable system in place which allows you to define any variable that can be expanded practically everywhere by using a familiar ${VAR} notation. Variables are inherited, meaning you can define them on a higher level to provide defaults and override them on lower levels to exact custom behaviour.
There are 3 levels of variable inheritance, starting with the System variables defined here under the Configuration section, down to Location variables and lastly Package variables. This allows you to create truly dynamic systems.
Variables are simple KEY => VALUE pairs. You can use a variable to have packages fetch installer content from a different content repository based on the location they are in for example, or differentiate the installed version of software based on a variable. The possibilities are endless! Having variables as a first class citizen within the Liquit system is what makes it easy to configure and manage.
Zones
Zones are basically separate Liquit systems, while using the same server infrastructure. This allows for full multi-tenant operations. Managed Service Providers, outsourcers and large customers with different work organisations will love this functionality.
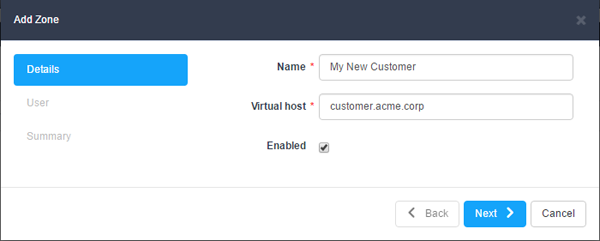
When you add a new zone to the system, you specify the hostname where it can be reached and a name to identify this zone (figure 2). Zones are licensed separately. Utilising zones, allows you to provide packaging services for your customers. They can all have their own individual Liquit zone which acts as a separate Liquit system.
By utilising the power of Liquit connectors, you can provide packages to all your customers, all from the same infrastructure, while still providing a secure and isolated environment.
Connectors
Connectors allow the Liquit system to connect to other systems and make their resources available within Liquit. This is a very powerful feature, that can save you tremendous amounts of time.
The connectors can be used to access resources from your Citrix Storefront, Microsoft RDS server, VMware App Volumes, SetupCommander’s Setup Store, or even another Liquit system (see figure 3).
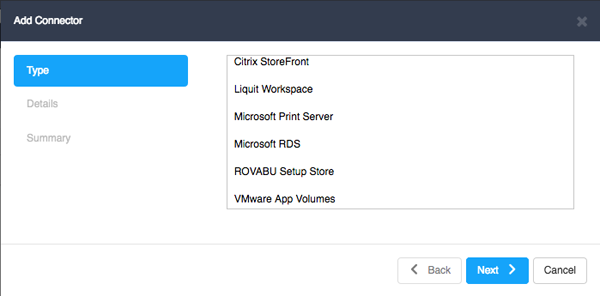
If you already have an existing Citrix StoreFront, setting up this connector will allow you to make all desktops and apps from the StoreFront directly available within the Liquit workspace. The same goes for the other connectors and their respective systems.
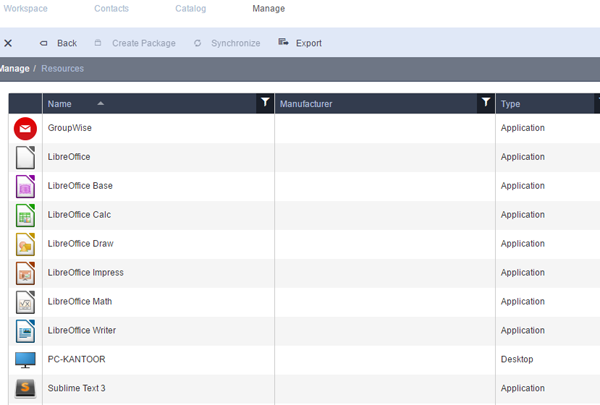
Once a Connector is configured, its resources can be found under the ‘Resources’ item in the delivery section, as shown in figure 4. To make these resources available, you create packages from them.
Packages
This is where you will spend most of your time within Liquit. Packages (figure 5) are at the heart of the Liquit system. Packages allow you to define if and how something should be made available to a user. There are many options available, so lets dive in.

- New Package
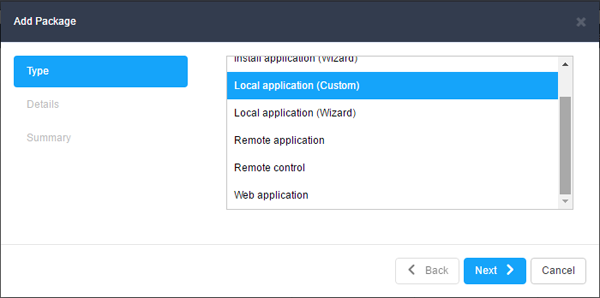
When you add a new package (figure 6), you will have to specify the type of package that you want to create. The types available are:
- Install application - is used for all packages that require the installation of software components on the user device.
- Local application - is used to make locally installed applications on the user device available within the Liquit workspace
- Remote application - refer to the Microsoft Remote App type applications
- Remote control applications - are used to define packages that have remote control software, so they can be used from within the Liquit workspace to remotely control user devices.
- Web application - allow you to specify URL’s that should be opened and any required parameters or specific browser versions.
The type selection is basically to provide you with the correct prompts for the chosen application type. After creation, you can easily switch types.
You have the option to configure different states of application provisioning;
- Distribution
- Installation
- Launch
- Uninstall
These are all familiar options which are enhanced by a rich filtering system. Filters allow you to fully customise if, how and when certain operations should occur by filtering on certain conditions.
Each package collects statistics on the success of failure of launching applications. An example is shown in figure 7.
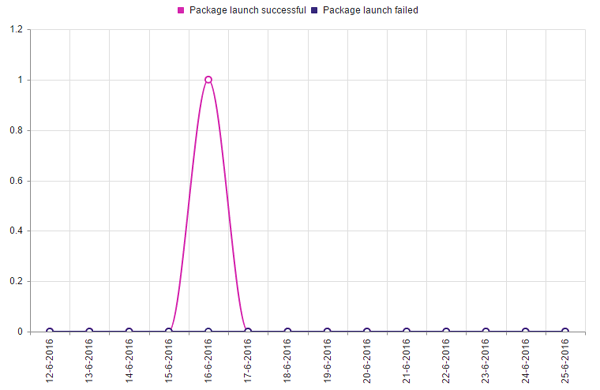
This shows you whether packages are being launched successfully or not.
Installing applications supports all common ways to install applications on user devices. Whether they are custom installer executables requiring extensive command line arguments or nicely packaged MSI applications accompanied by a MST file, Liquit does everything you require of an application installation system.
- Snapshots
A feature that is built-in is the snapshot feature within a package. This refers to the entire package configuration. Every change you make will be stored in a snapshot, allowing you to easily revert to a previous working condition, or branch out into multiple packages (figures 8 and 9).
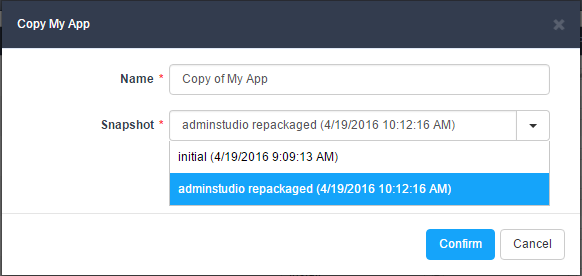
Not only is this handy in case you need to revert, but you can clone a package and subsequently specify the snapshot you want the clone to be based on.

This makes it possible to quickly create packages with a similar base.
- Categories
Packages can be placed in categories. You can create your own categories and these can be used in the workspace to filter the applications. Users can quickly find related or alternative applications when using the category system.
Security and Identity
Making applications available to your users is one thing, but you will need access controls that allow you to be specific in who get’s what and when. Liquit allows you to utilise your existing identity sources. (figure 10).
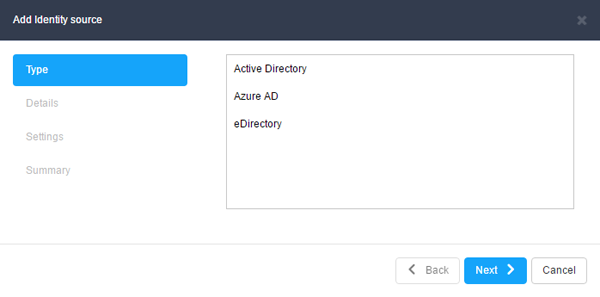
Liquit supports Active Directory, Azure AD and eDirectory as a source for your identities. You can configure the connection to allow users to change their passwords for the identity back-end through Liquit, further strengthening Liquit as the single point of access to all corporate resources.
You can then utilise the resources from the back-end to assign packages based on user or group membership.
The security section is also where you can define locations. A location can be defined by a simple filter set based on subnet addressing or HTTP header values. This allows the Liquit system to be location aware and allows you to use this data in all other facets of the system.
You can add authenticators to Liquit to provide 2-factor authentication based on RADIUS services. These authenticators can be required for certain locations, say, an external location. Internally, users can just use Liquit with the optional single-sign-on capabilities using the identity back-end and when they login from outside the corporate network they will be presented with the authenticator for 2-factor authentication. This keeps the system easy to use and secure at the same time.
Liquit boasts full role based access control (RBAC). You can fine-tune exactly who you want to give access to what.
The default roles can be expanded by creating your own roles, easily customisable through the interface and the privilege system.
Managed Targets
Managed Targets are divided into 4 sections:
- Devices
- Collections
- Users
- Teams
Managed Targets is as the name states the management of your targets. You can create collections which are either static or dynamic groups of devices. The dynamic part comes from the powerful rule system in Liquit, where you can filter which devices will be part of the collection. This can be used to create collections containing only Windows 10 devices for example, so you can easily assign certain packages to this collection to accurately pin point where you want your content delivered.
Managing your devices is also part of the managed targets section. You have the ability to dive into associated packages with a device, or use wake-on-lan (WOL) or any Remote Control package to remotely administer the device to provide support if needed.
System level teams can also be created here. Teams are groups of users, either system defined under managed targets or created by users themselves. Members are added with specified permissions, allowing them to link applications to a team, or create URL’s to resources for example. This is also filterable in the workspace, which caters to the dynamic nature of the workspace, allowing users to define the way they work best and share it with their team members.
Automation and Information
Liquit has a task system which allows you to run certain tasks automatically. Think of clean-up actions, like the automatic expiration of events or session logs for example. You could setup automatic synchronisation of collections or connectors, as shown in figure 11.

There is also a set of system defined tasks already in place, which you can fine tune. Just double click a task to edit it, change the parameters you want and save. It is that simple.
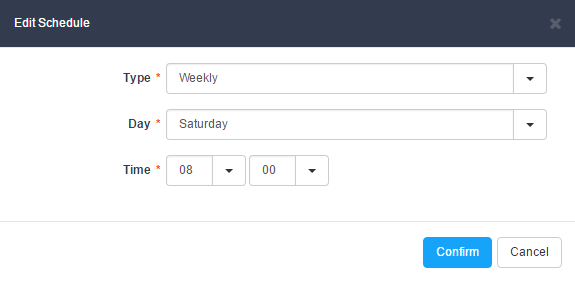
Scheduling is easily done through the interface where you can opt for any schedule you like, (figure 12) whether it is daily, weekly or on any interval.
The Liquit Info Center also has a dashboard view, giving you a top level overview of the packages in your system and the state of them. You can customise the graphs to provide you with the information you want to see.
Final words
Liquit is a dynamic system which uses the latest technologies. Development is progressing at a healthy pace with new features constantly being added from either requests or feedback. It is very easy to work with, yet very powerful and affordable.
There is no bloat of features making the product easy to use, but most of all easy on resources, with great performance. If this article caught your interest, be sure to check it out at liquit.com and request a trial to see for yourself.
This article was first published in OHM Issue 34, 2016/3. p24-28.

