
I’m guessing that you expend a significant amount of effort and money to ensure that your organisation’s data is kept safe. If your organisation is like most, I’m guessing that much of the effort and money around protecting your data is spent on keeping intruders out of your network. But what happens when your sensitive data hits the road? When an employee decides that she needs to work on that financial document or marketing campaign at home? When her best option to get that file home is a USB flash drive?
For the past 10 years, ZENworks Endpoint Security Management has provided policy-enforced encryption of removable drives, helping you ensure that sensitive data remains secure while on the move. We’ve provided this capability through an internal encryption engine controlled by our Data Encryption policy.
With the ZENworks 2017 Update 2 release, we’ve enhanced our removable drive encryption by adding Microsoft BitLocker support. So, given the fact that we already provide removable drive encryption, why did we add this ability? Well, the main reason is that you, our ZENworks customers, requested it.
Over the last year, as I would ask customers about their security concerns, I heard a lot of complaints about the lack (or difficulty) of centralised BitLocker key management. Apparently, more than a few users had lost data by locking themselves out of their drives when they forgot the password and couldn’t find the recovery key file.
Based on our extensive experience with key management, my Endpoint Security development team knew that we could solve this problem and provide a really strong centrally-managed solution for BitLocker removable drive encryption. And that’s what we’ve done.
Introducing Managed BitLocker Encryption
ZENworks Endpoint Security Management allows you to enforce BitLocker encryption on any drives that native BitLocker recognises as Removable Data Drives. Windows 7, Windows 8, and Windows 10 devices are all supported.
In addition, ZENworks enhances the BitLocker experience by providing password recovery options not available in native BitLocker. During drive encryption, a user can add a password hint when defining the unlock password. If needed, the user can display this hint when unlocking the drive. But if the hint doesn’t help, the user is still okay because we add a zone key during encryption of the drive; this key allows the user, with the help of an administrator, to unlock the drive and reset its password.
BitLocker encryption management is provided through our new Microsoft Data Encryption policy (Figure 1). The policy settings, explained below, let you control both the standard BitLocker encryption options as well as a few ZENworks-specific settings that enhance your control of BitLocker encryption.
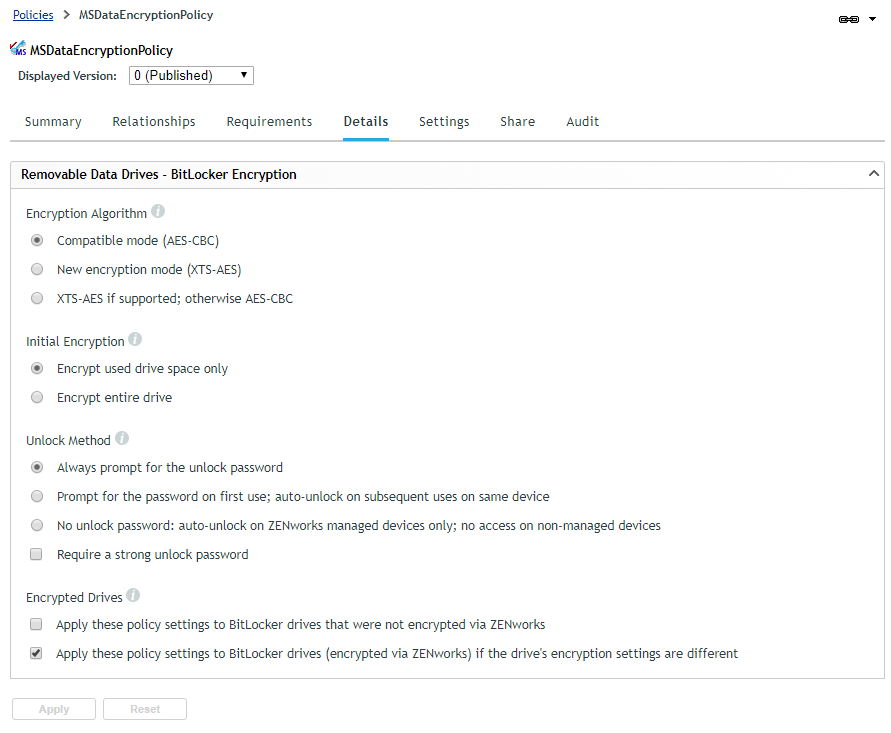
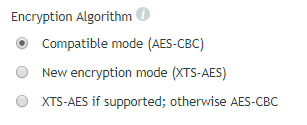
Encryption Algorithm
Both of BitLocker’s encryption modes—Compatible mode (AES-CBC) and New Encryption mode (XTS-AES)—are available. Each mode uses AES 256, but Compatible mode lets the drive be used on Windows 7, 8, and 10 devices while New Encryption mode allows the drive to be used only on Windows 10 v1511 or newer devices. The XTS-AES if supported, otherwise AES-CBC option uses the New Encryption mode (XTS-AES) if the encrypting device supports it, otherwise the Compatible mode (AES-CBC) is used.
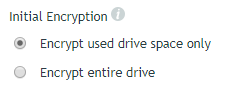
Initial Encryption
When BitLocker performs the initial encryption of a drive, it can encrypt the entire drive or only the used space on the drive. Encrypting the entire drive provides the strongest security—encrypting even deleted data that might still be retrievable—while encrypting used space is faster. Windows 7 always encrypts the entire drive regardless of this setting.
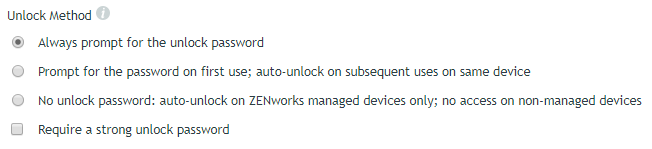
Unlock Method
When a BitLocker-encrypted drive is inserted into a device, it must be unlocked before it can be used. The policy supports the standard BitLocker unlock password option as well as a ZENworks-specific no password option.
The Always prompt for the unlock password option requires a user to enter the unlock password (defined at encryption time) every time the drive is inserted. If you don’t want this every time, you can use the Prompt for password on first use; auto-unlock on subsequent uses on the same device option, which essentially is the BitLocker unlock password setting used in conjunction with the BitLocker auto-unlock setting. You can enforce a strong password with either of the unlock password options.
Both of the unlock password options allow users to unlock the drive on any Windows device that has BitLocker, even non-ZENworks managed devices outside of your ZENworks zone. So, for example, a user could unlock the drive on their home Windows computer. If you don’t want drives to be used on non-ZENworks managed devices, you can choose the No unlock password; auto-unlock on ZENworks managed devices only; no access on non-managed devices option.
This option adds a zone key to the device during encryption but does not prompt the user to supply an unlock password. The result is that the drive can be unlocked on managed devices in the ZENworks zone but cannot be unlocked on non-managed devices because there is no user-supplied unlock password.
Encrypted Drives
At some point, one of your users will certainly use a BitLocker-encrypted drive that does not conform to the Microsoft Data Encryption policy’s settings. This could be a drive that was BitLocker encrypted on a home computer, or it might be a drive that was encrypted on a ZENworks managed device whose Microsoft Data Encryption policy has changed. In either case, you can choose whether or not to bring out-of-policy drives into compliance by using the Apply these policy settings to BitLocker drives that were not encrypted via ZENworks option and the Apply these policy settings to BitLocker drives (encrypted via ZENworks) if the drive’s encryption settings are different option.

Experiencing Managed BitLocker Encryption
In order to provide enforcement of the policy’s native BitLocker settings and the ZENworks-specific settings, we replace the native BitLocker controls with similar ZENworks controls when the policy is applied to a device. (Figure 6)
Encrypting a Drive
When a user inserts a non-encrypted drive, ZENworks displays an Encrypt Drive dialog box (Figure 6) prompting the user to define an unlock password (if the policy is configured for an unlock password). If you configured the policy to require strong passwords, the user can easily see the password requirements.
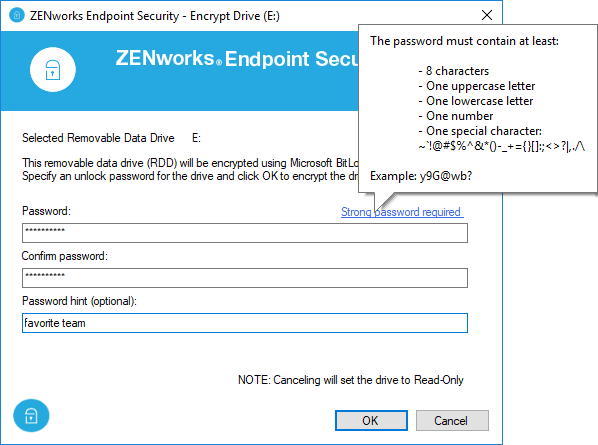
As mentioned earlier, one of the benefits of using ZENworks to manage BitLocker-encrypted drives is that, unlike BitLocker, we also allow the user to enter a password hint that can be displayed when unlocking the drive.
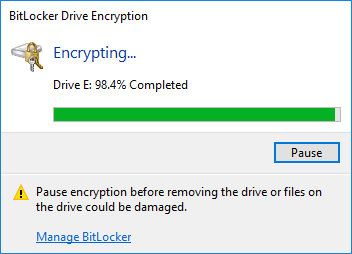
To ensure that no files can be transferred from the device to a non-encrypted removable drive, the drive is placed into Read-Only mode until the encryption starts. Encryption starts after the user defines the unlock password and clicks OK. The encryption progress is then displayed through the native BitLocker Drive Encryption dialog box (Figure 7).
If the policy is configured for no unlock password, the Encrypt Drive dialog is bypassed and the encryption starts immediately.
Unlocking a Drive
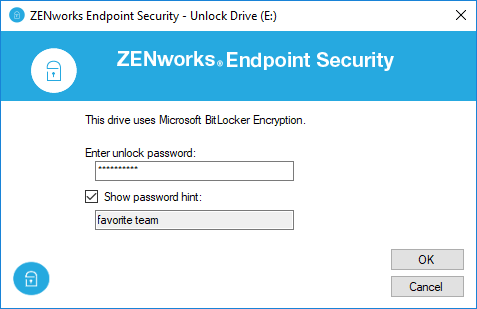
When a user inserts a drive that ZENworks has BitLocker encrypted, ZENworks displays an Unlock Drive dialog box (Figure 8) prompting the user for the unlock password. If they defined a password hint, selecting the Show password hint box displays it. If the user chooses not to unlock the drive, the drive remains inaccessible. The Unlock Drive dialog is bypassed if the policy is configured for no unlock password or is configured to auto-unlock the drive after its first use on the device.
Managing a Drive
Drives that are BitLocker encrypted via the Microsoft Data Encryption policy are represented in Windows Explorer exactly the same as if they had been BitLocker encrypted without the policy.
As you can see in Figure 9, a drive’s lock state is shown by the gold Locked Drive icon or the grey Unlocked Drive icon . The right-click menu for the drive displays the available native BitLocker management options.
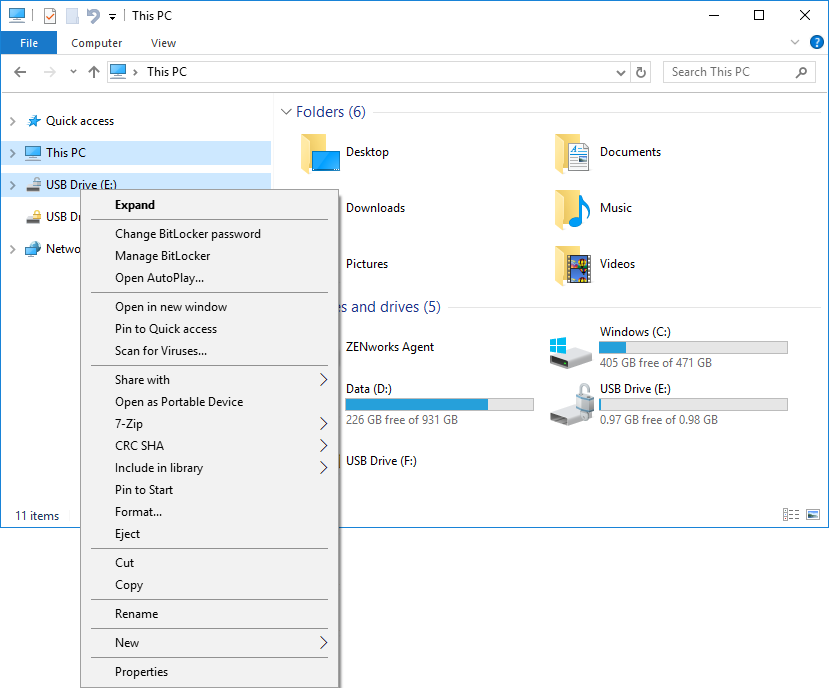
However, when a user selects one of the management options, the ZENworks Encryption Management dialog box (Figure 10) is displayed in its place. The Encryption Management dialog box shows the current state of the selected drive and lets the user perform all needed BitLocker management tasks, including resetting the password for drives if the unlock password has been forgotten.
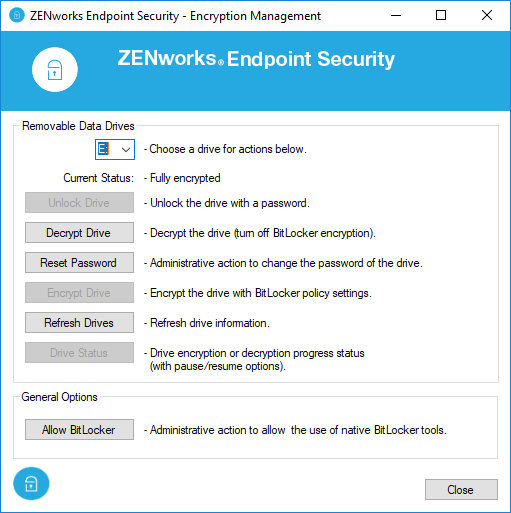
To reset the password, the user must provide an override password provided by the administrator. This can be the ZENworks Agent override password defined in ZENworks Control Center. More than likely, however, you would not distribute that password to a user; instead, you would use the Password Key Generator in ZENworks Control Center to generate a temporary override password.
Transitioning Encrypted Drives to the New Policy
If you are currently using the Data Encryption policy, you can easily transition drives to the new Microsoft Data Encryption policy. To do so, you leave the Data Encryption policy assigned to devices and also assign the new Microsoft Data Encryption policy. You need to leave the Data Encryption policy on the device because the Data Encryption policy’s driver has to be available to decrypt the drive during the transition.
Because the Microsoft Data Encryption policy takes precedence whenever the two policies are assigned to the same device, ZENworks automatically launches a drive transition utility (Figure 11) whenever a user inserts a drive that is encrypted with the Data Encryption policy.
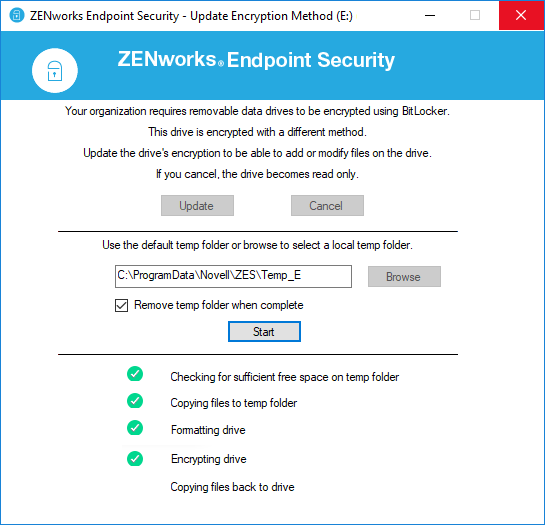
The utility copies the drive’s files to a temporary location on the device, formats the drive, encrypts the drive using BitLocker, and then copies the files back to the BitLocker-encrypted drive.
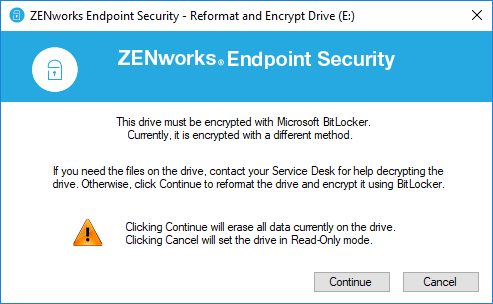
If the Data Encryption policy is not on the device when a user inserts a drive that is encrypted using the policy, ZENworks cannot decrypt the files and transition the drive to the new policy. In this case, ZENworks prompts the user (Figure 12) to get help if they want to keep the files. It they don’t want the files, they can reformat the drive and encrypt it.
To recover the files for a user, you can use the Administrator version of the ZENworks File Decryption utility.
A Quick Recap
The Microsoft Data Encryption policy, using BitLocker encryption, is the future of ZENworks removable drive encryption. Going forward, we plan to focus our development efforts around continued enhancements with the policy.
I encourage you to try the new policy. Hopefully, this article has shown you some of the benefits you’ll gain from using it. A quick recap:
- Centralised management of BitLocker encryption
- Policy-enforced use of BitLocker encryption
- Password hints and password reset for locked drives
- Enforced policy compliance for all drives, including previously BitLocker-encrypted drives
- Native encryption; no ZENworks driver required
This article was first published in Open Horizons Magazine, Issue 39, 2017/4, p23-26.
....To view the full article you must have a full Digital Subscription.