In early 2016 iPrint 2.0 was released with a host of new features one of which was WalkUp printing – and enhanced in iPrint 3.0 earlier this year (see the article What’s New in iPrint? by Punya Mall, in OHM37, 2017/2, p5-9). This eagerly awaited new feature allowed our customers to send print jobs to a virtual queue and then release them to the printer of their choice at the time of their choosing. While this was a powerful feature that many customers eagerly wanted, it did come with some drawbacks. The biggest hurdle for customers was the fact that it required the user to log into a web portal to release a print job.
Fortunately, we quickly released an update that allowed customers to release print jobs via the mobile app. While this update was an improvement, it was still cumbersome to pull out your mobile phone when you wanted to release a print job.
In iPrint 3 we added yet another job release mechanism for WalkUp Printing. Proximity cards using an external RF IDeas Ethernet 241 device. Alongside the release of this feature was an API that allowed other interested partners to also develop solutions to take advantage of WalkUp Printing.
One such partner is Apulse Technical Communication Co., Ltd. (ATC, sna.com.tw)). ATC first came to my attention when a customer sought a mechanism to use PIN codes to release print jobs. Now the ATC iPrint Card Reader is an all-in-one device specifically designed for the Micro Focus iPrint Appliance.
ATC’s device has a numeric keypad and a card reader and supports both. It fits the bill perfectly. I reached out to Doctor Hung (doctor@sna.com.tw) from ATC, and he was gracious enough to provide me with a test device. I’ve been having a lot of fun testing the unit since receiving it and thought I’d share some experiences with you.
iPrint Setup
Before getting too far ahead of ourselves, we need to take care of a few basics first. Let’s take a look at some of the iPrint setup that you will need.
Clients or Clientless
To start a print workflow, you obviously need to submit a job. There are a couple of options here. Use iPrint clients/apps or simply go clientless with Quick Print. If you have a customised application, print client functions can be embedded into it, for job submission.
WalkUp Printing
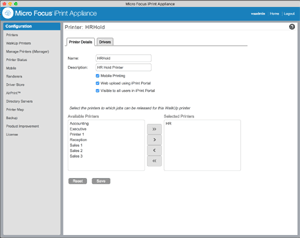
As mentioned earlier WalkUp printing is a virtual print queue that you can assign to one or more printers, where the print jobs will be held until they are ready to be released. To create a new WalkUp printer from the iPrint Administration Console:
- select WalkUp Printers and New
- name the WalkUp Printer
- add a Description, (optional)
- select further options
- select all of the printers that will service this queue
- click Next
- assign the proper drivers to the queue
Note that you must pick something that all of the printers can understand. Optionally add a printer address to provide status information, and then click Finish. You’ve now created a new WalkUp Printer that will hold any print jobs until they are released by the user. For more details on the configuration, please see Figure 1.
If you step back for a minute and think about the workflow I’ve just described—the print job is tied to the user, and the user must release it—you will realise that we’re not quite done yet. In order for the job to be tied to the user, the printer is by definition a Secure Printer. iPrint creates the new WalkUp Printer as such, and you still need to assign rights to the users to be able to access the printer.
From the iPrint Administration Console, launch Manage Printers (iManager) to add the rights. Once you log in, from the iPrint | Manage Printer menu, browse to select and access your printer. Under Access Control, add all the users (individually, as a group, or a container) who will be allowed to access this printer. At this point it’s probably a good idea to test the WalkUp Printer configuration to make sure it works by itself.
Directory Synchronisation
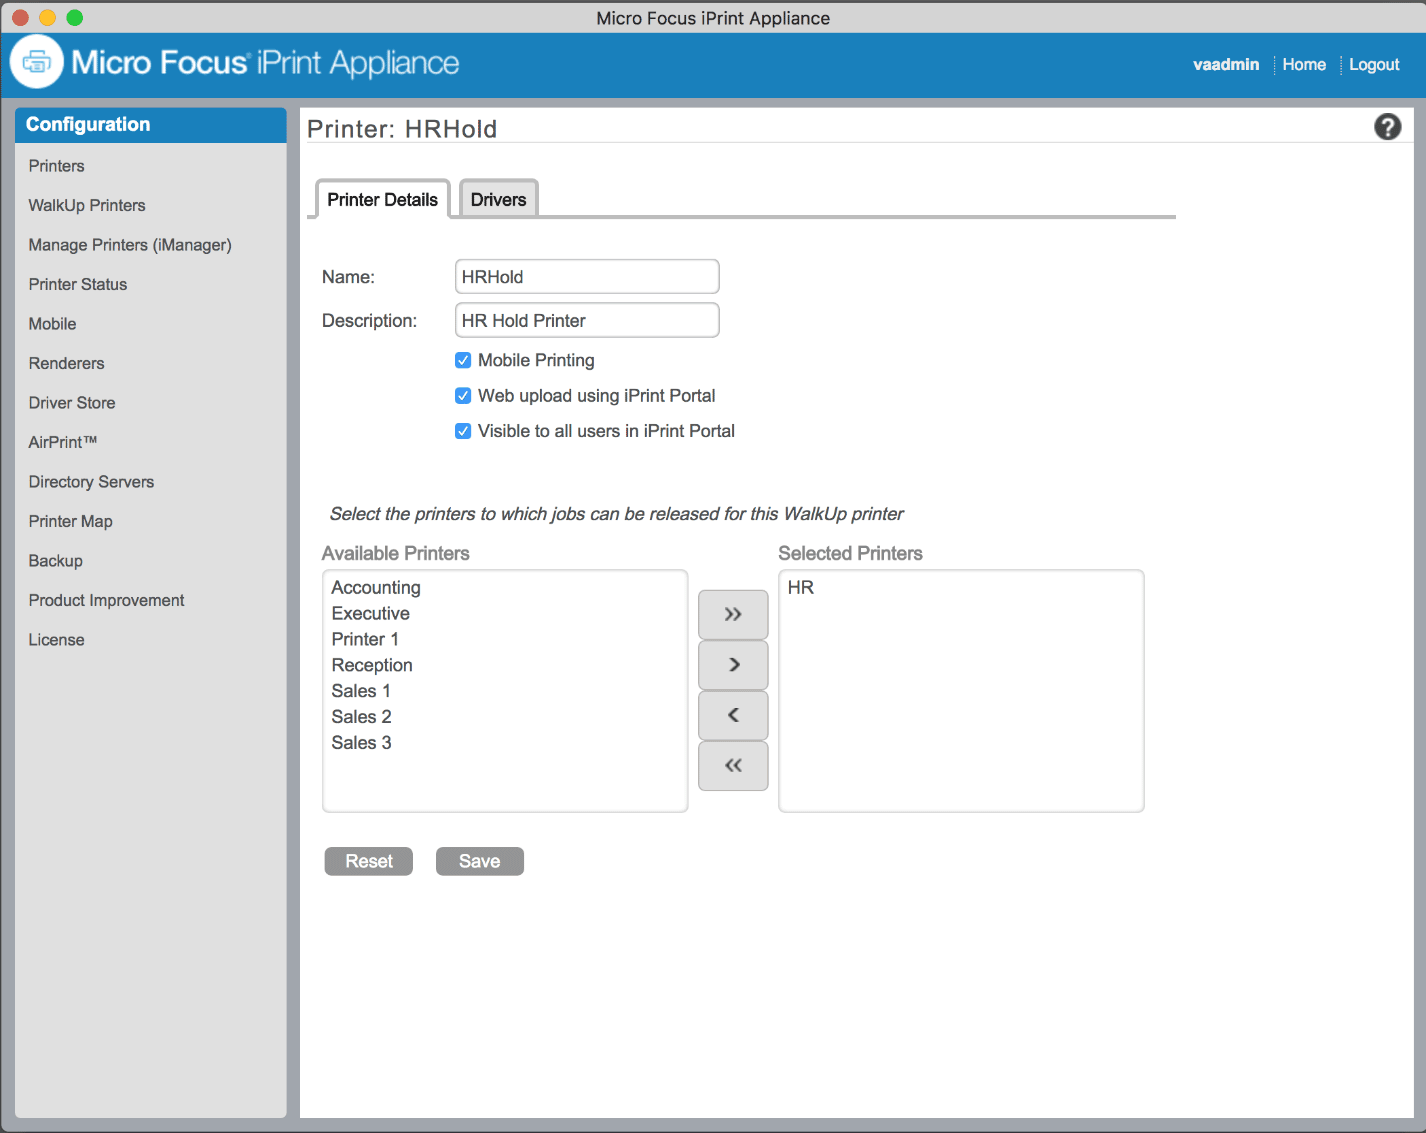
In order to release a print job via a PIN/Passcode or a “smart card” of some sort, you need to store the code or the ID of the card somewhere. To tell iPrint where this information is stored, go back to the iPrint Administration Console and select Directory Servers. Click on the LDAP profile(s) that you have listed here to edit the configuration. Check the box next to User Card Release for printing jobs. In the box below, you will need to enter the directory attribute that you are using to store the code/ID. In my demo, I chose “employeeNumber.” For details of this configuration, please see figure 2.
ATC Reader Configuration
With the iPrint configuration complete, it’s time to set up the ATC iPrint Card Reader. Out of the box, the reader comes with the following configuration:
Default IP address: 192.168.0.18
Default subnet mask: 255.255.240.0
Default DNS: 192.168.0.250
Default gateway: 192.168.0.1
Default Web URL: http://192.168.0.18/cardweb/index.jsp
Default User: admin
Default Password: Password
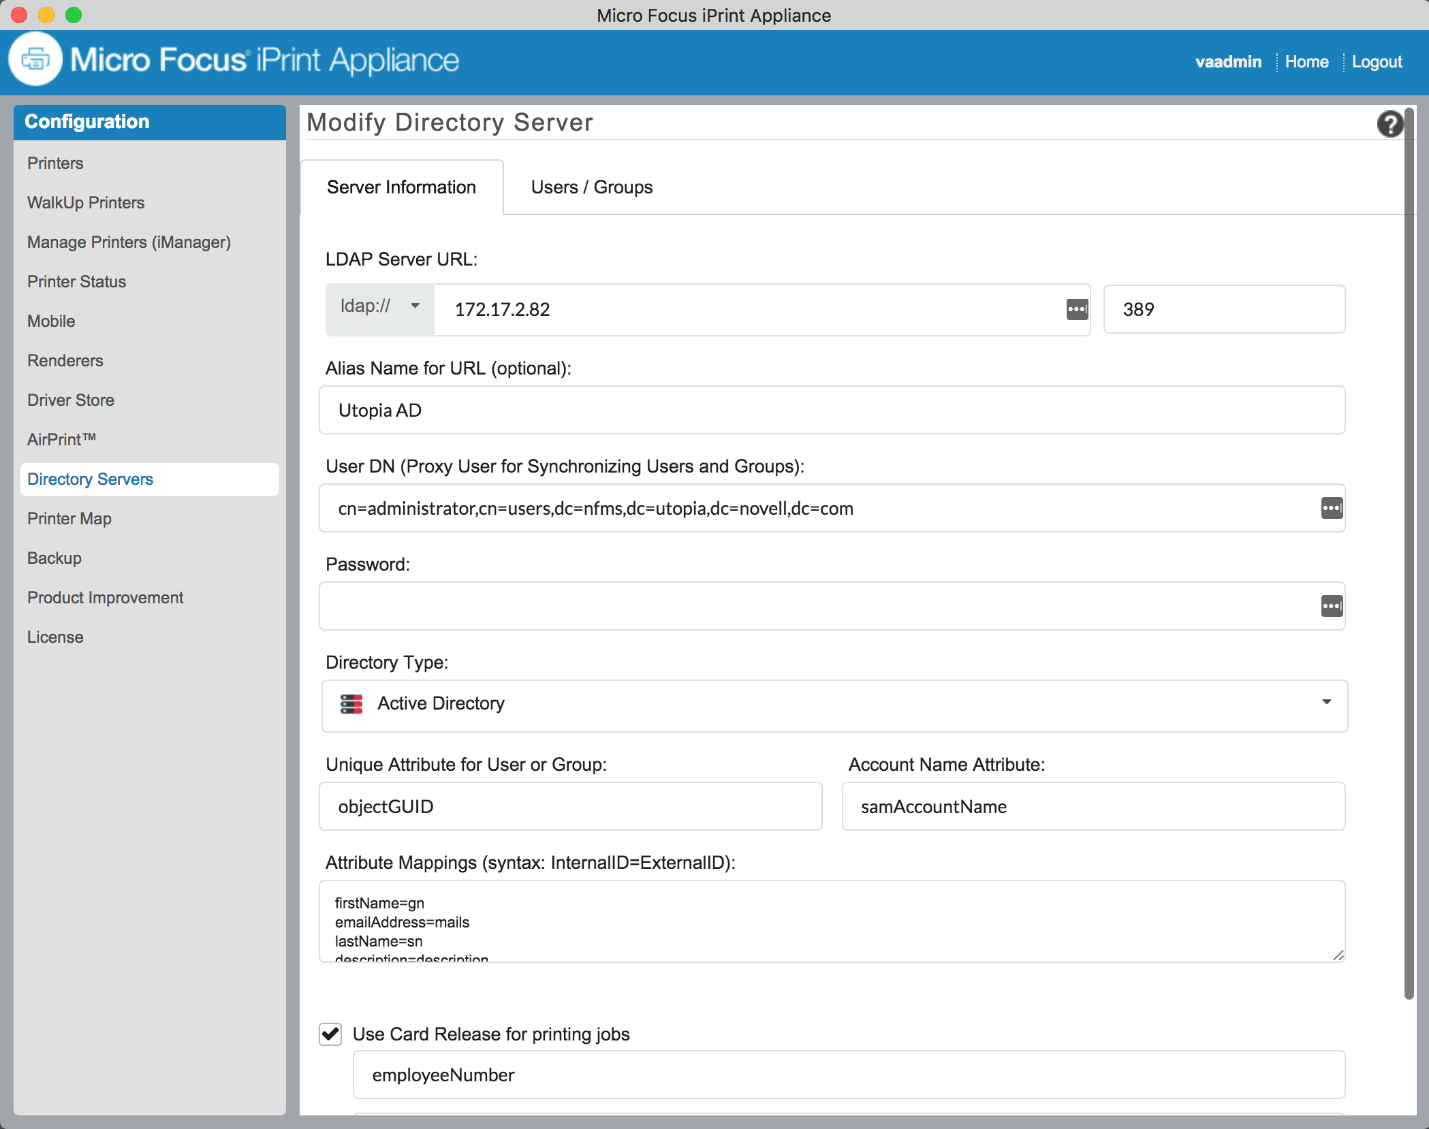
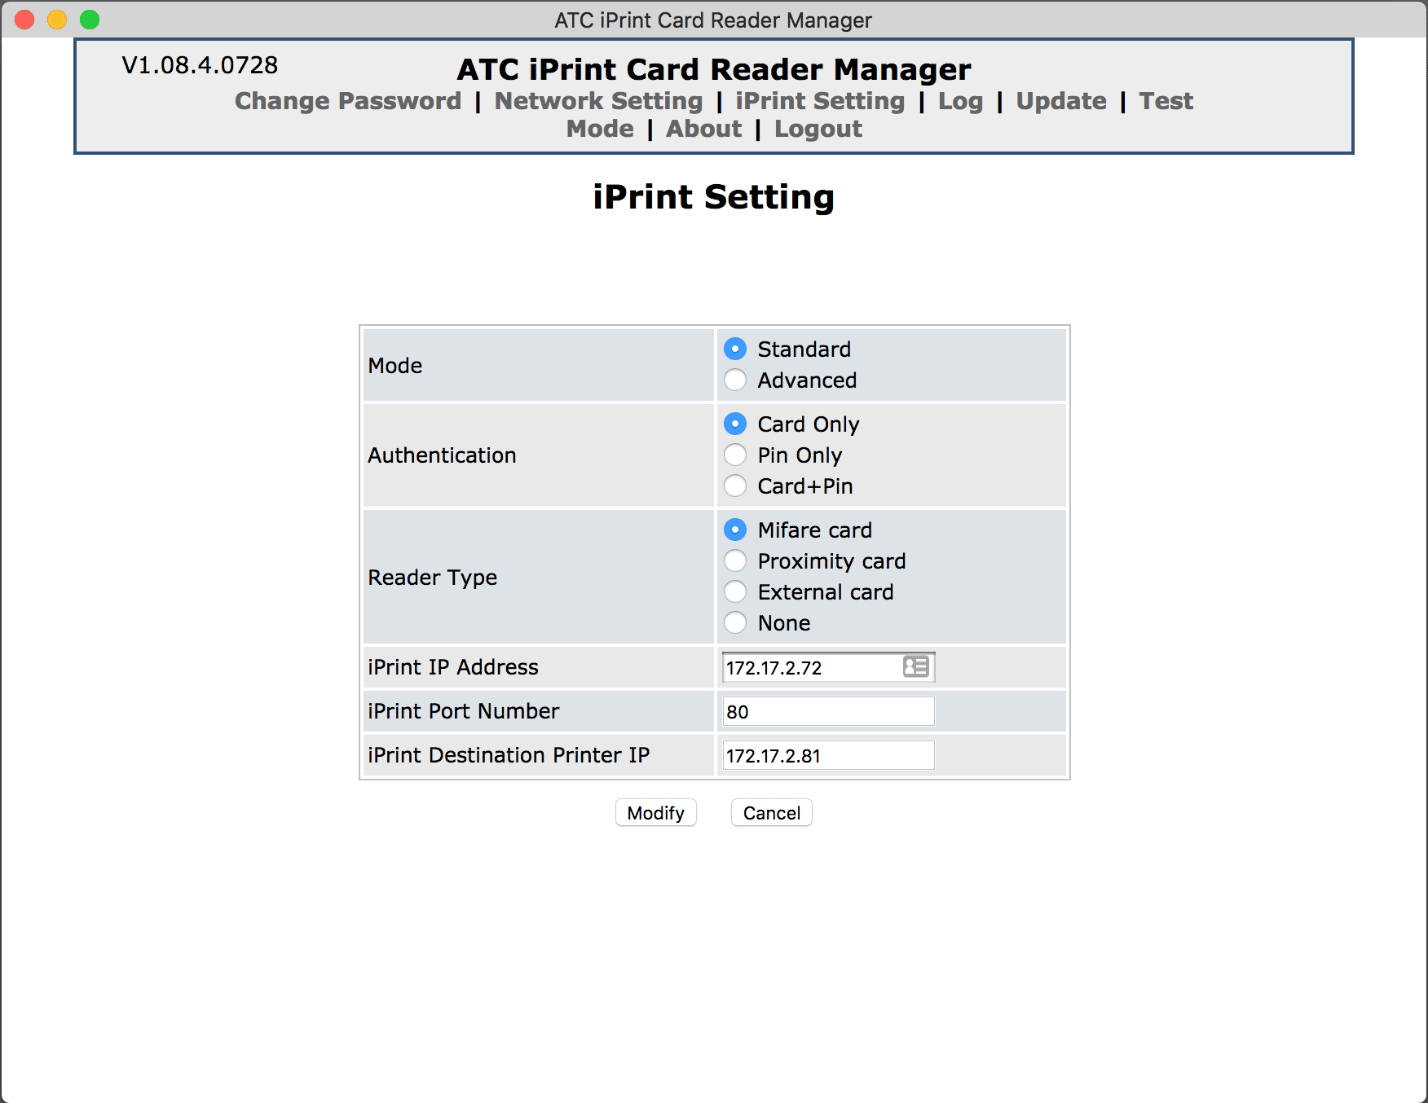
As with other devices that come preconfigured with an IP, you will need to set your computer’s IP address to something on the 192.168.0.x subnet, connect a cross-over cable or connect both devices to a hub. Next, open a browser to start configuring the device. The first menu option will be to change the default admin password. Next, you can modify the Network and Time settings as appropriate to your environment. The third tab is the iPrint Setting option—see Figure 3.
Select Modify for the iPrint Settings:
- Keep Mode at Standard.
- Under Authentication, choose the type of authentication you will want to use: card, PIN code, or both. Again, the values of these will be stored in the “employeeNumber” attribute above. If you select both, the values need to be stored in the format of “<card ID>.<PIN>” for example 12345678.1234.
- For Reader Type, select the card reader type that you have. In my case, I have a Mifare card reader.
- iPrint IP Address is the iPrint server IP address.
- iPrint Destination Printer IP is the IP address of the printer that the Reader is sitting next to where you want to release print jobs.
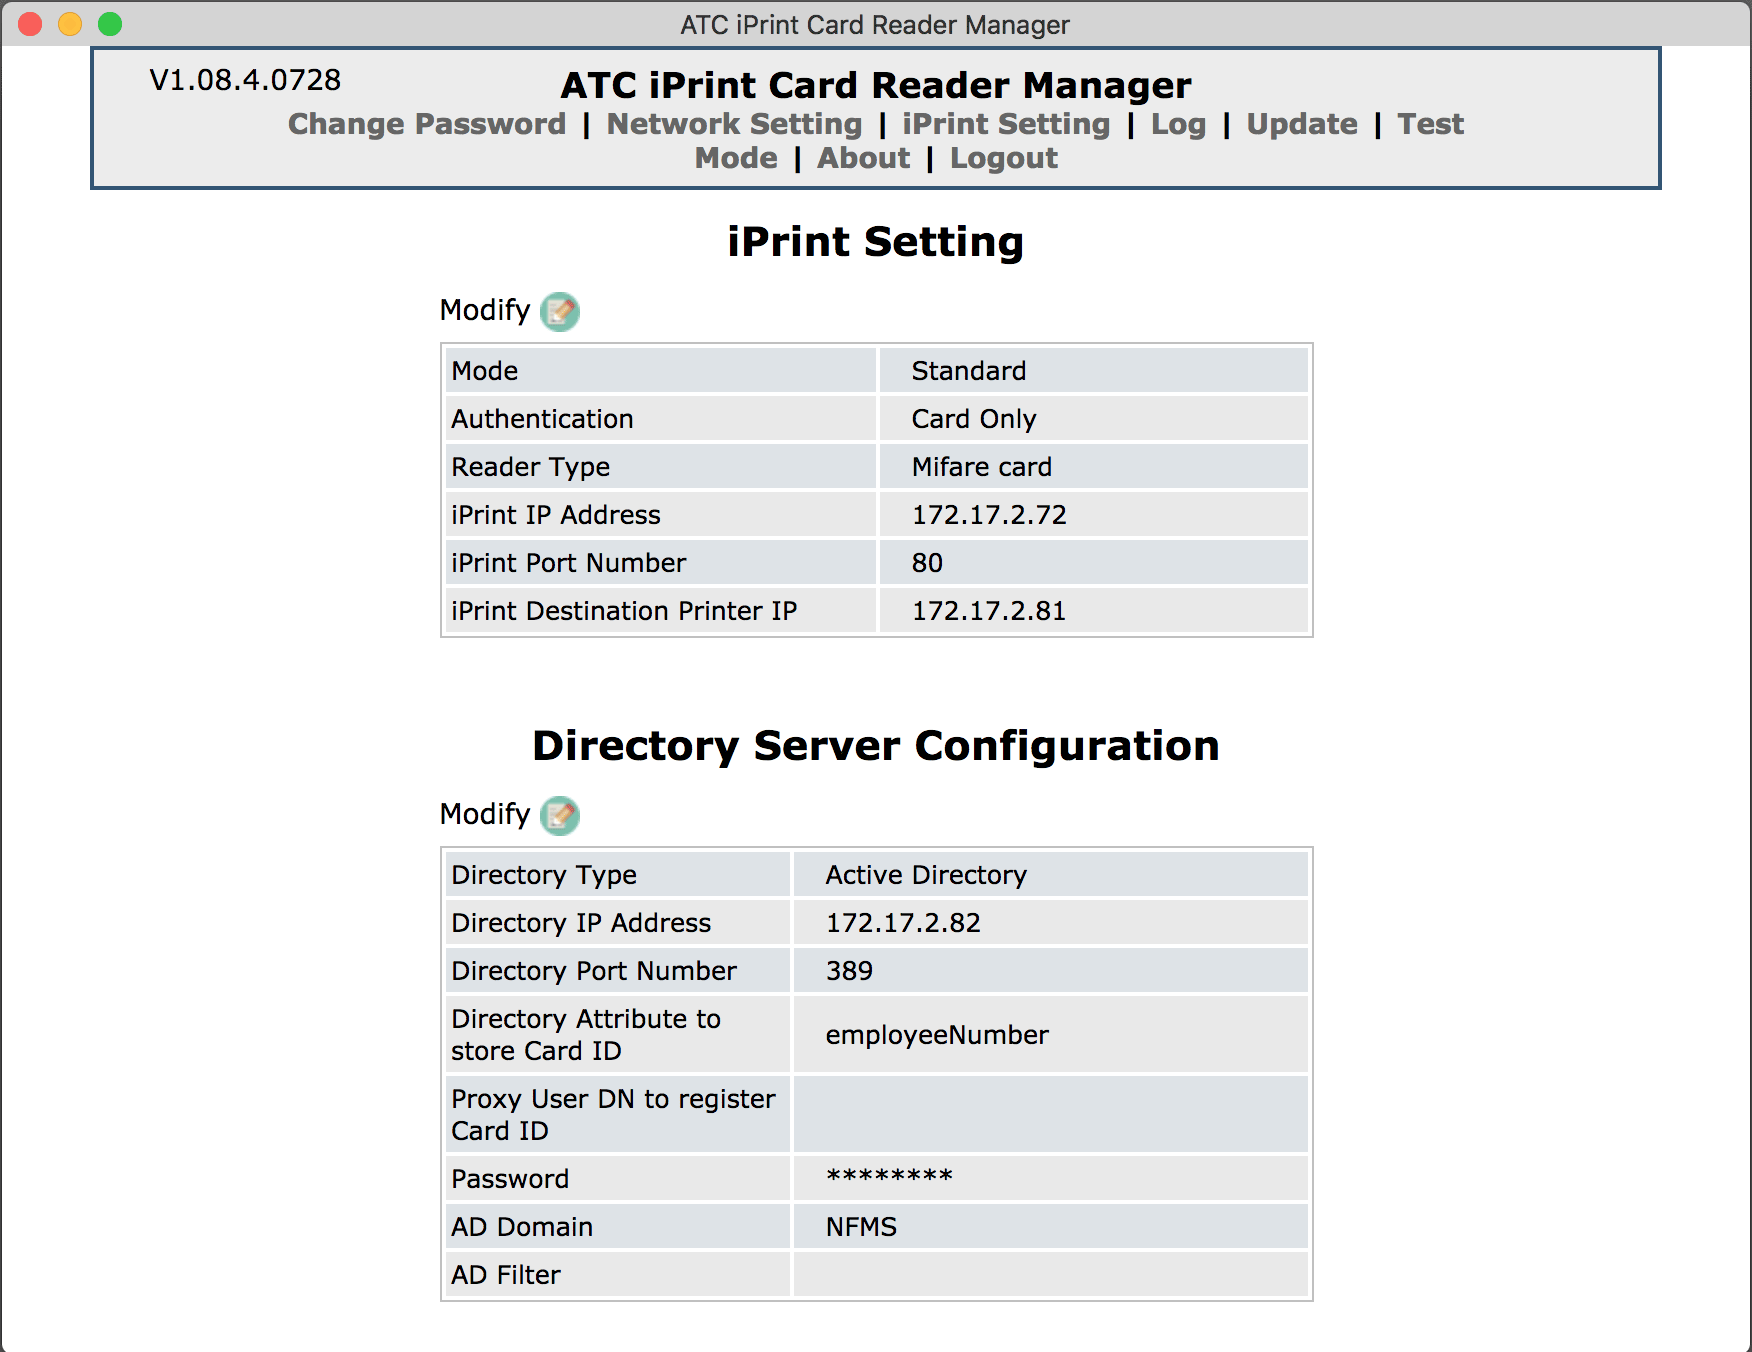
When a valid PIN code is entered or a card is read, the Reader communicates with iPrint to check for jobs that are owned by that code/ID (user) and asks it to release the jobs to that printer. For details on this configuration, please see Figure 4. For the Directory Server Configuration, simply enter the IP, Port, and other information for your LDAP server.
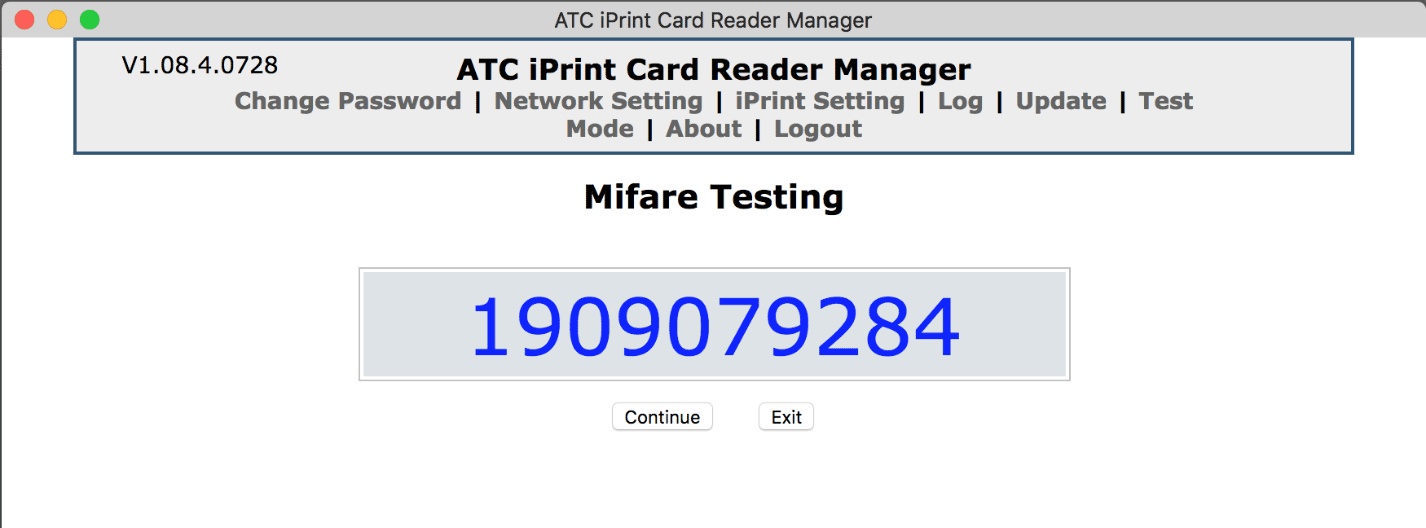
Before leaving the Reader configuration, you’ll want to head over to the Test Mode tab. Here you can confirm not only that your connection to iPrint works but that there is also a test to make sure the Reader itself works. You can confirm that all of the buttons on the numeric keypad work and also that your cards are being read properly. When you test a card, the Reader will display the value that it read from the card. See Figure 5.
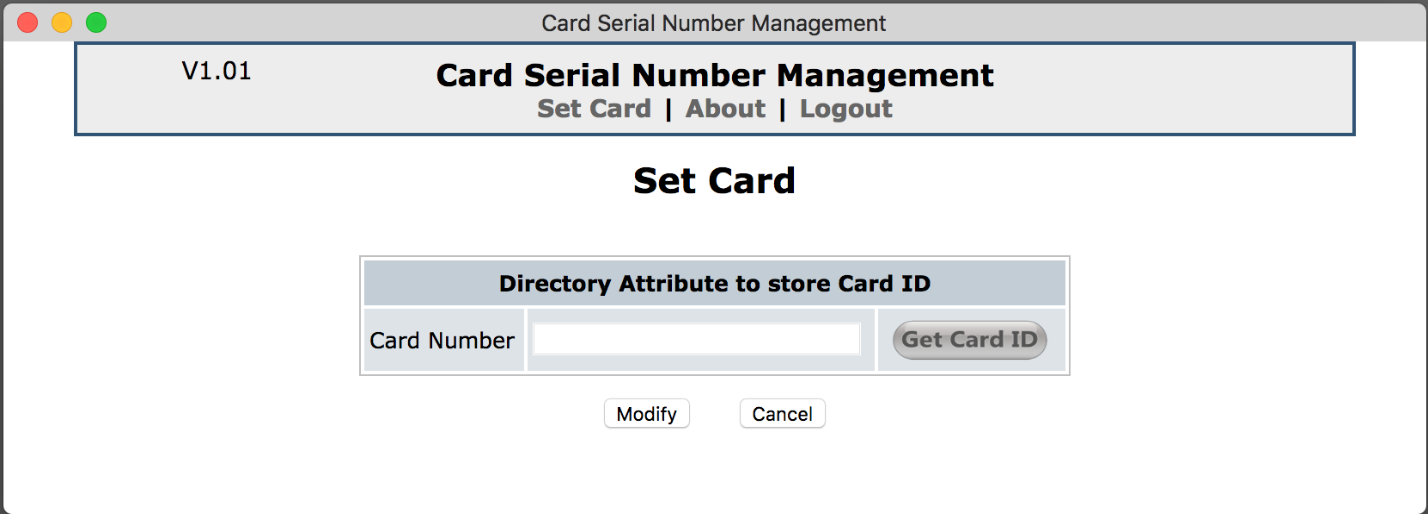
The ATC Reader also includes a management console to assign card IDs to the owners of those cards. Using the configuration you provided in the Directory Server Configuration, your users can then visit http://<ATC_Reader_IPaddress or host_name>/cardweb/csn/index.jsp and log in with their credentials.
They can then simply enter their PIN and/or swipe their card to record their information and associate it with their user ID. For details on this, please see Figure 6.
Directory Configuration
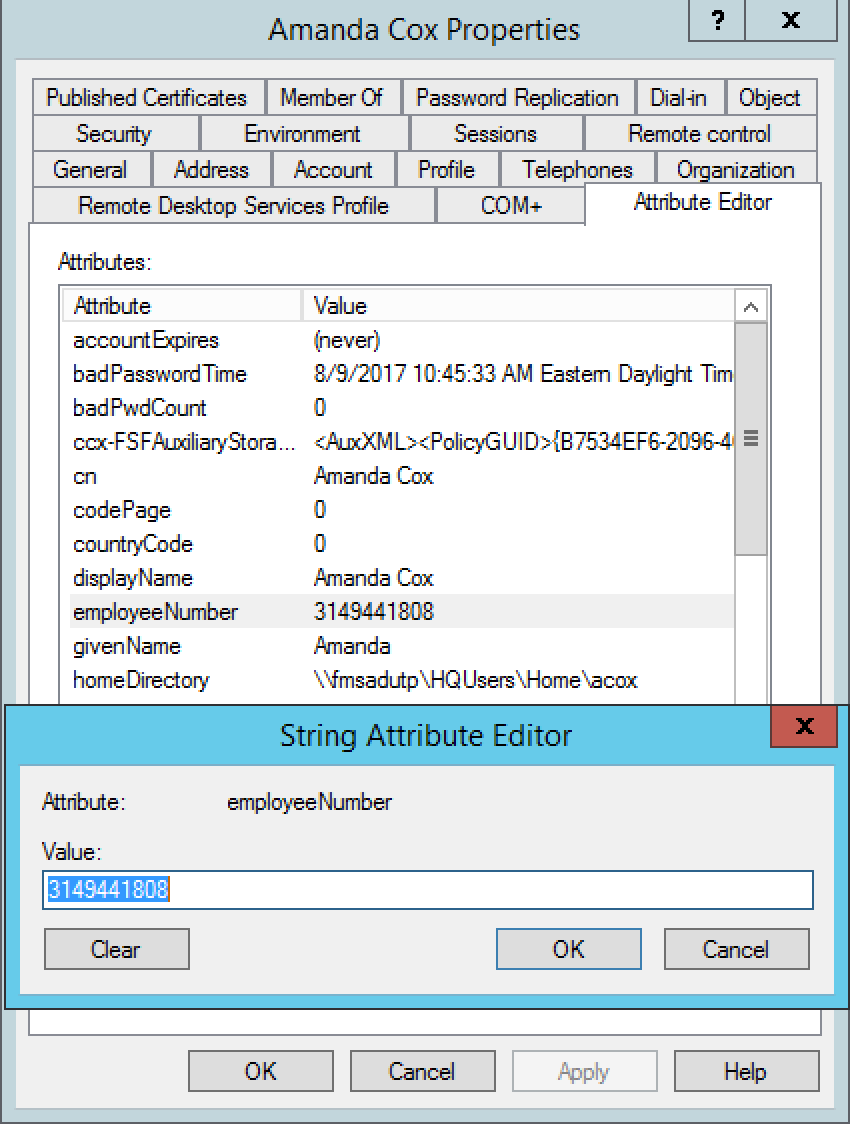
In my setup, I am using Active Directory. If you go into Active Directory Users and Computers, you can edit the attributes for the desired user and enter the card value that you read in the AT Reader. See Figure 7 for an example of a user configuration.
Ready to Print!
At this point you should be ready to print. Simply submit a job, via whatever means, to your newly created WalkUp printer. You can verify that the job is being held in the appropriate WalkUp print queue by logging into the release portal at https://<Appliance_IPaddress or host_name>:9443/release-portal.
You should see your job waiting there. Next, go to the ATC reader and either enter your PIN code or swipe your card—depending on which options you chose to enable. If everything went right, you should hear a beep and see a green light on the front of the Reader. Within a few seconds, your job should come out on the associated printer.
For more information about the ATC reader, please contact Doctor Hung at doctor@sna.com.tw.
I have produced some YouTube videos showing the ATC Reader in action that you might be interested in:
- Using just a PIN/Passcode: https://youtu.be/fF2syI8WQC8
- Using a Mifare Card: https://youtu.be/491ASJfCMhM
What’s most exciting are the opportunities that this capability offers. In the second video, I utilise a hotel room key to release a print job. Not only can obvious things like employee badges or student cards be used but also hotel room keys, loyalty or membership cards, library cards, payment cards, etc. The opportunities are virtually limitless.
Hopefully, you’ll find your own use for using WalkUp printing with a suitable release mechanism in your environment.
This article was first published in OHM Issue 38 (2017/3), p11-14.