Recently I had an interesting question from a customer in the United Kingdom, which I thought would make a great question for this article. If you have a question that might be interesting to discuss in the Open Horizons Magazine feel free to send it to qanda@open-horizons.net
Q: I’ve heard that I can also do an inventory of my network printers using ZENworks. How does that work and what information will it give me?
A: We can indeed scan the printers in your network and get some inventory information. This information is retrieved from the printer through the SNMP scan along with the network discovery. On the reporting server there are a few predefined reports for a page count overview and a report on ink/toner levels.
Discovery
Let’s first look at how we can get the information from the printers. As mentioned before we do this by using the discovery feature within ZENworks. This scan doesn’t only allow us to scan for deployable Windows PC’s but it also allows us to identify printers and other network devices.
To run a scan we first need define a Discovery Task. To do this click on deployment in the ZCC screen and then select New to create a new discovery task.
We will be using the IP Discovery and need to specify a number of IP addresses manually (the LDAP discovery is used to discover Windows Workstations that are known in AD). Enter a name for the Discovery task and click Next.
The next screen allows us to specify the discovery methods, if we want to get information from printers and network devices we will need to enable SNMP.
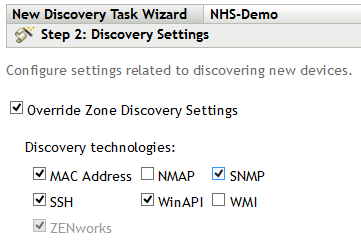
After we’ve enabled SNMP Discovery we can click next.
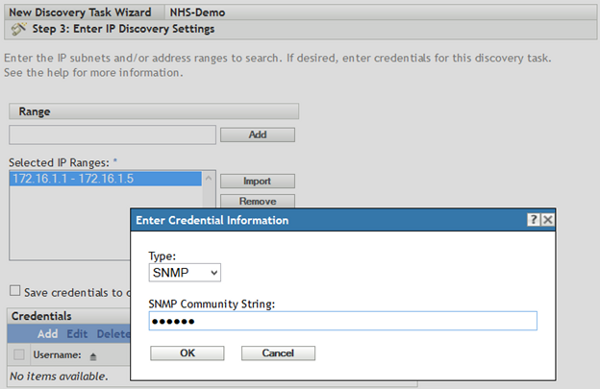
Step 3 allows us to specify some IP ranges on what we would like to discover. Additionally we can specify what credentials need to be used during this scan.
We can enter an IP address or a range of IP addresses. To specify a range you can just use X.X.X.X – X.X.X.X or you can specify the subnet x.x.x.x/n.
Next, we should not forget to specify the SNMP community string so that we can read the SNMP data. At credentials click new and select SNMP credentials. Then you can enter the SNMP Community String.
OK, the next step is where we can specify if this task needs to be scheduled. By default it will run the task once after the creation but it can be configured to run weekly or once a month etc. For monitoring printers the scheduler can be very useful.
Step 5 allows us to specify a specific primary server to perform the scan and step 6 allows the configuration of a proxy device to perform a scan (SNMP scans can be done by a Windows proxy).
This concludes the creation of a Discovery task. If you schedule this to run once a week it will just scan for the printer status during each scan.
Discovered devices
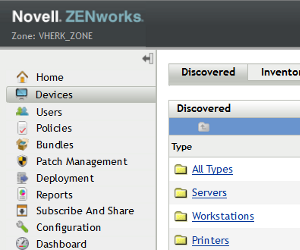
After the scan has completed its discovery the detected network and printer devices will be visible in the Devices menu underneath the tab Discovered Devices.

Here the Printer devices should be visible within the Printers folder. If you click the individual printer some basic information is displayed.
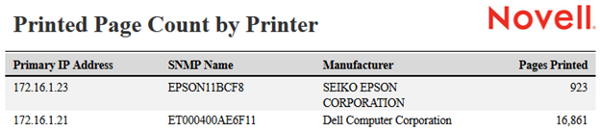
Not all information is exposed through ZCC, so to get some more information we will need to use ZENworks Reporting. Here we have a few pre-built reports that have information about page count and toner level.
There you have it. Surveying your network printers from the comfort of your office workstation, using ZENworks!
This article was first published in OHM29, p37-38, June 2015